
Welcome to our comprehensive guide on Warmup underfloor heating installation. This guide covers benefits, system types, step-by-step installation, key considerations, safety tips, and FAQs to ensure a smooth process.
What is Underfloor Heating?
Underfloor heating is a system that distributes heat evenly across a room through heating elements installed beneath the floor. It provides radiant heat, warming the space from the ground up, eliminating the need for radiators. This efficient method ensures consistent temperatures and can be powered by electric mats or hydronic systems, offering flexibility for various spaces. Unlike traditional heating systems, underfloor heating operates at lower temperatures, reducing energy consumption while maintaining comfort. It is particularly ideal for modern, open-plan interiors, as it creates a sleek, unobstructed aesthetic. Whether installed in new constructions or retrofitted in existing homes, underfloor heating offers a reliable, energy-efficient solution for heating needs. Its versatility and performance make it a popular choice for homeowners seeking comfort and convenience. Proper installation and maintenance are key to maximizing its benefits and longevity.
Benefits of Underfloor Heating
Underfloor heating offers numerous advantages, including energy efficiency, as it operates at lower temperatures than traditional systems, reducing energy consumption. It provides even heat distribution, eliminating cold spots and creating a comfortable environment. By removing the need for radiators, it enhances interior design flexibility, allowing for sleek, unobstructed spaces. Additionally, underfloor heating is compatible with various flooring types, including tiles, wood, and carpets. The system is also low maintenance and has a long lifespan when properly installed. Furthermore, it reduces dust circulation, making it a healthier option for those with allergies. Overall, underfloor heating combines comfort, efficiency, and aesthetic appeal, making it a popular choice for modern homes.
Types of Underfloor Heating Systems
Underfloor heating systems are primarily categorized into electric and hydronic (water-based) systems. Both offer efficient heating solutions tailored to different spaces and requirements, ensuring optimal comfort and energy use.
Electric Underfloor Heating Systems
Electric underfloor heating systems are a popular choice for their simplicity and ease of installation. They consist of electric heating mats or cables embedded beneath the floor, providing consistent warmth. These systems are ideal for retrofitting in existing homes and can be installed under various floor types, including tile, wood, and carpet. Electric systems are energy-efficient and offer precise temperature control through thermostats. They are also low maintenance, with minimal moving parts and no risk of leaks. When installing electric underfloor heating, ensure the subfloor is properly prepared and insulated to maximize efficiency. Always follow the manufacturer’s instructions and consider consulting a professional for complex setups. Proper installation ensures safety, efficiency, and long-term performance.
Hydronic (Water-Based) Underfloor Heating Systems
Hydronic underfloor heating systems use water to distribute warmth evenly across the floor; A boiler or heat pump heats the water, which circulates through pipes embedded in the subfloor. These systems are highly energy-efficient, especially when paired with a renewable heat source. Hydronic systems are ideal for large spaces and offer long-term cost savings. Installation involves laying insulated pipes in a specific pattern, often in concrete or screed. The subfloor must be sturdy to support the weight and moisture. While more complex to install than electric systems, hydronic heating provides consistent warmth and is suitable for both new builds and renovations. Proper installation ensures optimal performance and efficiency, making it a popular choice for homeowners seeking a reliable heating solution.
Assessing Your Space for Underfloor Heating

Evaluate your space by measuring rooms, identifying heat sources, and checking floor conditions to determine the best system configuration for even warmth distribution.
Evaluating Your Floor Type and Space Requirements
Evaluate your floor type to ensure compatibility with underfloor heating. Concrete, wooden, and tiled floors are common options, each requiring specific system considerations. Measure room dimensions and identify heat sources, such as radiators or fireplaces, to optimize warmth distribution. Assess insulation levels, especially in older homes, to prevent heat loss. Consider the layout of furniture and fixed features like doorways and windows, as these impact heating efficiency. Calculate the total floor area to determine the required heating output. Ensure the subfloor is structurally sound and level to support the system. Accurate measurements and assessments are crucial for proper system design and even heat distribution.
Choosing the Right System for Your Needs
Selecting the appropriate underfloor heating system depends on your home’s specific requirements. Consider whether electric or hydronic systems suit your space better, based on factors like floor type, budget, and desired heat output. Electric systems are ideal for smaller areas or retrofit projects, while hydronic systems are more efficient for larger spaces or new constructions. Assess your heating needs based on room usage and insulation levels. Compare system costs, including installation and long-term energy consumption. Additionally, consider the compatibility of the system with your existing heating source, such as boilers or heat pumps. Finally, evaluate thermostat options to ensure precise temperature control. Professional consultation can help tailor the system to your unique needs for optimal performance.
Tools and Materials Required for Installation
Installing underfloor heating requires specific tools and materials to ensure a successful setup. Essential items include insulation boards, underfloor heating mats or cables, a thermostat, and connecting wires. You’ll also need a multimeter for electrical testing, a notched trowel for adhesive application, and a laser level for precise installation. Additionally, materials like flexible tile adhesive, grout, and a damp-proof membrane are necessary for floor preparation and finishing. Ensure you have a drill, cable ties, and protective gear like gloves and safety glasses. For hydronic systems, piping, manifolds, and water pumps are required. Always refer to the manufacturer’s specifications for system-specific components to avoid missing critical items.
Preparing the Subfloor
Ensure the subfloor is clean, dry, and level. Inspect for cracks or damage and repair as needed. Apply insulation and membranes to enhance efficiency and prevent moisture issues.

Inspecting and Cleaning the Subfloor
Before installing underfloor heating, thoroughly inspect the subfloor for debris, cracks, or unevenness. Clean the surface to ensure proper adhesion and heat distribution. Remove old adhesives, dust, or moisture, as these can hinder performance. Check for structural integrity and address any damage. Ensure the subfloor is dry, as moisture can lead to system inefficiency or damage. Use a vacuum or brush to remove loose particles, and fill cracks with a suitable filler. A clean, stable subfloor is essential for optimal heat transfer and system longevity. Neglecting this step may result in uneven heating or premature wear. Always follow manufacturer guidelines for subfloor preparation.
Ensuring Subfloor Compatibility with Underfloor Heating
For underfloor heating to function efficiently, the subfloor must be compatible with the system. Check the subfloor material—concrete, wood, or screed—and ensure it meets thermal conductivity requirements. Concrete subfloors are ideal for hydronic systems, while wood subfloors may need additional insulation or a barrier to prevent moisture transfer. Ensure the subfloor is structurally sound and can handle the weight of the heating system and flooring; Verify that the subfloor material is suitable for the chosen heating type, as some materials may not conduct heat evenly. Always consult manufacturer guidelines to confirm compatibility. Proper subfloor preparation ensures efficient heat distribution and prevents future issues. Address any incompatibilities before proceeding with installation for optimal performance.
Applying Insulation and membranes
Applying Insulation and Membranes
Proper insulation and membrane installation are crucial for efficient underfloor heating. Start by applying high-quality insulation materials, such as rigid foam boards or thermal insulation layers, to the subfloor. This helps retain heat and reduces energy loss. Next, install a damp proof membrane to prevent moisture from rising into the heating system or flooring. For hydronic systems, a decoupling membrane may also be necessary to protect against movement and stress. Ensure all materials are tightly fitted and sealed to avoid gaps. Insulation should meet local building codes for thermal performance, typically with a minimum R-value rating. Properly applied insulation and membranes ensure optimal heat distribution, energy efficiency, and system longevity. Always follow manufacturer guidelines for installation.

Installation Steps for Warmup Underfloor Heating
Plan the layout, install heating elements, connect to a thermostat, test the system, and secure the elements before finishing the floor with your chosen flooring material.
Laying Out the Heating Elements
Begin by measuring the floor area and planning the layout to ensure even heat distribution. Place the heating mats or cables in the designated zones, avoiding areas under fixtures or furniture. Secure the elements to the subfloor using adhesive or fasteners. Ensure proper spacing between heating elements for uniform coverage. Use a notched trowel to spread adhesive evenly and press the mats firmly into place. Follow the manufacturer’s guidelines for spacing and layout to optimize performance. Double-check the placement to ensure all areas are covered adequately. Properly routing the heating elements ensures efficient operation and prevents hotspots or cold spots in the room.
Installing Electric Underfloor Heating Mats or Cables
Begin by reading the manufacturer’s instructions thoroughly. Ensure the subfloor is clean, dry, and insulated. Lay out the electric underfloor heating mats or cables according to the planned layout, cutting them to size if necessary. Secure the mats to the subfloor using adhesive or double-sided tape. For cables, use cable fixings or clips to hold them in place. Leave sufficient space between loops for even heat distribution. Connect the mats or cables to the thermostat and electrical supply, ensuring all connections are secure and meet safety standards. Use a multimeter to verify continuity and check for any damage. Follow the manufacturer’s guidelines for voltage and power requirements. Once installed, test the system to ensure it operates correctly before proceeding with flooring installation.

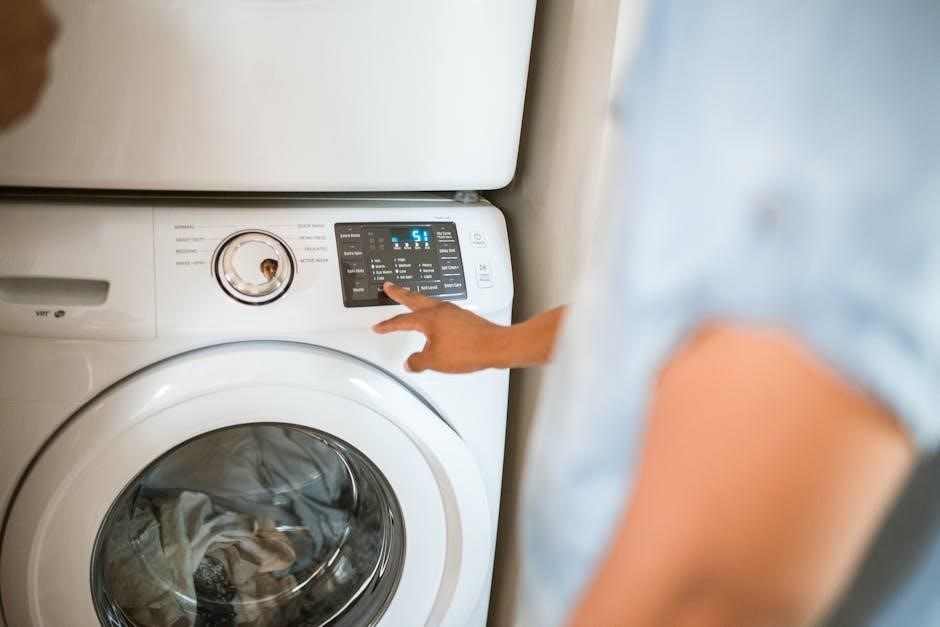
Connecting the System to a Thermostat
Connecting your underfloor heating system to a thermostat is crucial for temperature control. Begin by ensuring the power is off to avoid electrical hazards. Locate the control unit of your underfloor heating system, as this is where the thermostat will connect. Use a wiring diagram specific to your system to identify the correct terminals for the thermostat wires. Carefully strip the wires and secure them to the appropriate terminals using screwdrivers or wire connectors. Choose a location for the thermostat where it can accurately sense the room temperature, away from drafts and direct sunlight. Once connected, turn the power back on and test the system by adjusting the thermostat to ensure the heating elements respond correctly. For programmable or smart thermostats, set up your desired schedule to optimize energy efficiency. Always consult the manufacturer’s instructions for specific guidance on connecting the thermostat to your Warmup underfloor heating system.
Testing the System Before Final Installation
Before completing the installation, it’s essential to test the underfloor heating system to ensure it functions correctly. Start by checking the electrical connections and thermostat settings. Turn on the system at a low power setting and verify that heat is evenly distributed across the floor. Use a multimeter to check for continuity and proper insulation resistance. For hydronic systems, inspect for leaks in the pipes or connections. Allow the system to run for at least 24 hours to identify any issues. Address any uneven heating or electrical malfunctions promptly. Testing ensures the system operates safely and efficiently before laying the final flooring. Always follow the manufacturer’s guidelines for testing procedures.
Securing the Heating Elements and Finishing the Floor
Once the underfloor heating system is tested and functioning properly, secure the heating elements firmly to the subfloor using the manufacturer’s recommended fixings. Ensure all cables or pipes are tightly fastened to prevent movement during flooring installation. Check for any damage to the heating elements and repair or replace them if necessary. Leave the recommended expansion gaps to accommodate heat-induced movement. Finally, install your chosen flooring material, such as tile, wood, or carpet, according to the manufacturer’s guidelines. Ensure the flooring is compatible with underfloor heating and adheres properly to the subfloor. Complete the installation by connecting the system to the thermostat and performing a final inspection to ensure everything is secure and ready for use.

Key Considerations for a Successful Installation
Ensure proper insulation, configure zoning accurately, and maintain optimal moisture levels in the subfloor to maximize efficiency and longevity of your Warmup underfloor heating system.
Importance of Proper Insulation
Proper insulation is critical for maximizing the efficiency and performance of your Warmup underfloor heating system. Insulation prevents heat loss through the subfloor, ensuring that warmth is directed upward into the room rather than downward. This not only improves energy efficiency but also reduces energy consumption and operating costs. Insulation materials, such as foam boards or insulation membranes, create a thermal barrier that enhances heat distribution and maintains consistent temperatures. Additionally, proper insulation protects the heating elements from potential damage caused by moisture or uneven heat distribution. By installing high-quality insulation, you can ensure your underfloor heating system operates effectively, providing long-lasting comfort and reliability to your space.
- Prevents heat loss through the subfloor.
- Enhances energy efficiency and reduces costs.
- Ensures even heat distribution.
- Protects heating elements from damage.
Zoning and Thermostat Configuration
Zoning and thermostat configuration are essential for optimizing your Warmup underfloor heating system. Zoning allows you to divide your space into separate areas with independent temperature controls, ensuring energy efficiency and personalized comfort. A programmable thermostat enables you to set specific heating schedules and temperatures for each zone, adapting to your lifestyle and preferences. Proper configuration ensures even heat distribution, reduces energy waste, and maximizes system performance. By programming your thermostat to align with your daily routines, you can enjoy consistent warmth while minimizing energy consumption. Regularly reviewing and adjusting your zoning and thermostat settings will help maintain optimal comfort and efficiency throughout your home.
- Divide your space into temperature-controlled zones.
- Program schedules to match your daily routine.
- Adjust settings for energy efficiency and comfort.
- Regularly review and update configurations.
Maintaining Proper Moisture Levels in the Subfloor
Maintaining proper moisture levels in the subfloor is crucial for the longevity and efficiency of your Warmup underfloor heating system. Excess moisture can damage the heating elements, compromise adhesion, and lead to structural issues. Before installation, ensure the subfloor is dry and free from dampness. Use a moisture meter to verify levels, which should typically be below 2.5% for most flooring materials. If moisture levels are high, address the issue by improving ventilation, using a dehumidifier, or applying a moisture barrier. Regularly monitor the subfloor, especially in areas prone to water exposure, to prevent moisture buildup. Proper maintenance ensures reliable performance and extends the lifespan of your underfloor heating system.
- Check moisture levels with a moisture meter before installation.
- Ensure the subfloor is completely dry and free from dampness.
- Use a moisture barrier if necessary to protect the system.
- Monitor and address high moisture levels promptly.

Safety Reminders and Precautions
Always turn off power before handling electrical components; Follow manufacturer guidelines for installation and operation. Avoid water exposure to heating elements. Keep sharp objects away from cables to prevent damage.
General Safety Guidelines for Underfloor Heating Installation
Ensure the power supply is disconnected before starting installation. Handle heating elements and components with care to avoid damage. Wear protective gloves and goggles when cutting or drilling materials. Follow the manufacturer’s instructions for all products. Keep the installation area clean and well-ventilated. Avoid overheating the system during testing. Regularly inspect cables and pipes for leaks or damage. Never install underfloor heating near water sources or in areas prone to flooding. Ensure the subfloor is dry and stable before proceeding. Consult a professional if you’re unsure about any step. Always adhere to local electrical and building codes. Maintain a safe distance from flammable materials during installation. Properly secure all components to prevent movement or shifting. Keep children and pets away from the installation area. Ensure the system is compatible with your floor type and structure.
Electrical Safety Tips
Always disconnect the power supply before handling electrical components. Hire a licensed electrician for complex wiring tasks. Never attempt DIY electrical work without proper training. Use a ground fault circuit interrupter (GFCI) to protect against electrical shocks. Ensure all connections are secure and follow the manufacturer’s wiring instructions. Avoid overloading circuits or using incorrect cable ratings. Test all electrical components before installation to ensure they are functioning properly. Keep electrical components away from water to prevent short circuits. Use only certified and compatible materials for your system. Regularly inspect wires and connections for signs of wear or damage. Follow local electrical codes and standards during installation. Never leave live wires exposed or unsecured. Ensure proper earthing of the system to maintain safety.

Frequently Asked Questions (FAQs)
How Much Does Underfloor Heating Installation Cost?
Costs vary based on system type, installation complexity, and space size, typically ranging from $10 to $30 per square foot.
Can I Retrofit Underfloor Heating in an Existing Home?
Yes, underfloor heating can be retrofitted, but it may require floor modifications and professional assistance for proper installation.
How to Maintain and Troubleshoot Your Underfloor Heating System
Regularly inspect for leaks, check thermostat settings, and ensure proper insulation. Consult a professional for persistent issues or system malfunctions.
The cost of underfloor heating installation varies depending on the system type and space size. Electric systems are generally more affordable upfront, with prices starting at $10 per square foot, while hydronic systems can range from $15 to $30 per square foot due to the complexity of installation. Factors such as floor type, insulation needs, and labor costs also influence the total price. For a small bathroom, costs might be around $1,000 to $3,000, while larger spaces can exceed $10,000. It’s important to consult a professional for an accurate quote tailored to your specific project requirements and budget constraints.

Yes, underfloor heating can be retrofitted in an existing home, but it requires careful planning. The process is more complex than in new constructions, as it involves lifting floors or working within existing spaces. Electric systems are often easier to retrofit, especially in smaller areas like bathrooms or kitchens. Hydronic systems may require more extensive modifications. Factors such as floor type, space constraints, and insulation must be considered. For homes with concrete subfloors, installation might be more challenging. It’s essential to ensure the subfloor can support the heating system and that there is adequate clearance. Consulting a professional is highly recommended to assess feasibility and avoid potential structural issues.
Regular maintenance is crucial to ensure your underfloor heating system operates efficiently. Start by checking the thermostat settings and ensuring proper insulation around pipes. Inspect visible components like pipes and electrical connections for damage or leaks. For hydronic systems, monitor water pressure and bleed radiators if necessary. If issues arise, common problems include uneven heating or system leaks; Check for blockages in pipes or malfunctioning sensors. For electric systems, ensure mats or cables are functioning correctly. Always refer to the manufacturer’s guidelines for troubleshooting. If problems persist, contact a professional; Routine servicing, including annual checks, can prevent long-term damage and maintain optimal performance.
Final Tips for a Smooth Installation Process
For a seamless Warmup underfloor heating installation, plan meticulously and prepare thoroughly. Begin by creating a detailed layout plan and ensuring all materials are on-site. Always follow the manufacturer’s guidelines and safety protocols to avoid errors. Conduct a final inspection of the subfloor to ensure it’s clean, dry, and level. Use the recommended tools and materials to prevent damage to the heating elements. Work methodically, securing the heating mats or cables firmly to avoid air gaps. Double-check all connections before covering the system. Consider consulting a professional if you’re unsure about any step. Finally, test the system thoroughly before finishing the floor to ensure everything functions perfectly. Proper planning and attention to detail will ensure a smooth and successful installation.
Maximizing Efficiency and Longevity of Your System
To ensure your Warmup underfloor heating system operates efficiently and lasts for years, proper maintenance and usage are essential. Start by insulating your home well to minimize heat loss and optimize performance. Regularly inspect the system for leaks or damage, especially in hydronic systems, and address issues promptly. Use a programmable thermostat to regulate temperatures effectively, avoiding extreme settings. For electric systems, ensure mats or cables are not covered by thick flooring materials. Keep the subfloor dry to prevent moisture-related damage. Avoid placing heavy furniture or appliances directly over heating elements. Finally, follow the manufacturer’s maintenance recommendations and consider annual professional checks to ensure optimal functionality and longevity. These steps will help you enjoy a reliable and efficient underfloor heating system for years to come.